Car Stereo Installation
There is a good chance you found our website, Thunder Electronics, while searching for – car stereo installation near me. Many of your customers find that car audio is much more rewarding when you DIY your car audio installation. That is the reason why many, if not all, automotive and marine electronics come with detailed instructions. Despite popular beliefs, about 75% of those purchasing custom car stereo and electronics like – head units, speakers, amplifiers, subwoofers, backup cameras, and car DVRs both online and at retail car stereo stores rely on DIY installation.
Consumers can find an abidance of car audio installation resources at places like YouTube and Metra Electronics, which offers a free APP with vehicle-specific information on wiring colors, location, and more. When I was in retail, I would often have young clients come to me with super cheap car audio products not worthy of installing, but they were so concise of the installation cost that they catered their budget to include installation. I know this because just a few days prior, they would stop by to ask how much to install an amp, how much to install door speakers, and so on.
Car Stereo Installation Tools
The key to success with your car stereo installation is not following instructions but rather having some basic but much-needed tools to complete the task. For the most part, these tools usually cost less than a car audio shop will charge for labor. One of the most challenging tasks is taking the vehicle apart and removing panels. As I mentioned before, you can find videos detailing the specifics of just about any vehicle make and model on YouTube in many instances. However, acquiring a trim removal tool kit, wire cutters, a small socket set, and some crimp-on connections is something you should consider.
Installation of a Car Audio System
Believe it or not, installing a car audio system is as simple as respecting the negative and the positive. All vehicles operate on DC (Direct Current) to the best of my knowledge. That means that as long as you know who is positive and who is negative, this is a task you should be able to complete.

I strongly suggest buying an amplifier wiring kit. This is something that even professional installers use because it gives you a jump start on the material list requirements for the installation. If this is your first time doing this, I am going to recommend buying the wiring hardness pigtails for the head unit and speaker. The amplifier wiring kit should have just about everything you need, but at times, extra wires, adapters, and or brackets may be necessary depending on the vehicle.
Here is a very broad description of the procedure. Start by locating an opening to run the power cable from the engine compartment to the cab. Most vehicles will have empty rubber grommets for future options, but if yours has none, make sure to use a grommet where you drill through. Disconnect the negative terminal from your battery and then install the amplifier’s positive cable to the battery. Your amplifier wiring kit should have included a large fuse for this cable. This fuse must be installed as close to the battery’s positive terminal as possible.
With the cable inside the car, remove your running boar moldings and route the cable to where you are installing the amp. Once you have selected a location for the amplifier, go ahead and bolt it down. NOTE: Many people opt to bolt their amplifiers to the subwoofer box. That is not a good idea. The combination of heat and vibration from the enclosure is a perfect recipe for an amplifier’s premature failure. Go ahead and connect your positive power lead to the amp and the negative lead using wire ferrules. Then, find a nearby bolt to secure the other end of the ground cable. Consider scrapping the sheet metal around the bolt to better contact the vehicle’s frame. After the system is up and running, go back and spray the area ideally with anti-rust paint. In a worst-case scenario, nail polish will do!
With the amp secured, let’s go ahead and remove the head unit! If you are keeping the OEM head unit, consider acquiring mail and a female harness from Metra. In this case, you will also have to run eight sets of wires instead of four to the amp. Four pairs are signal input into the amp, and four groups are the amp output feeding the speakers via the factory wiring. As always, there are exceptions to the rules. For example, if your vehicle has a factory amp (usually found in the trunk). Many believe that you have to run heavy gauge wiring to the speakers. After many years of competing in car stereo competitions, I have found that this is unnecessary and, more often than not, damaging to the vehicle, especially if the car has Molex plugs in the doors.
With all eight pairs of wires at the amp location, it is time to connect your inputs and output to the amp. Please keep a good count of who is the in and who is the out. If you back feed power to the head unit, you will damage it! Whenever possible, use different color wires. Another pro tip is splitting and twisting your input wires into a braid. This will help cancel electromagnetic noise from the car’s computer and electrical system. I have gone as far as adding Clip-on Ferrite Ring to the amp side.
You are going to need a remote turn-on for the amp. All aftermarket head units come equipped with this, but many OEMs are not. In this case, connect your remote turn on to the accessory power feed of your head unit. This is the cable that turns on and off with the key. Please download the Metra APP for details on your particular vehicle.
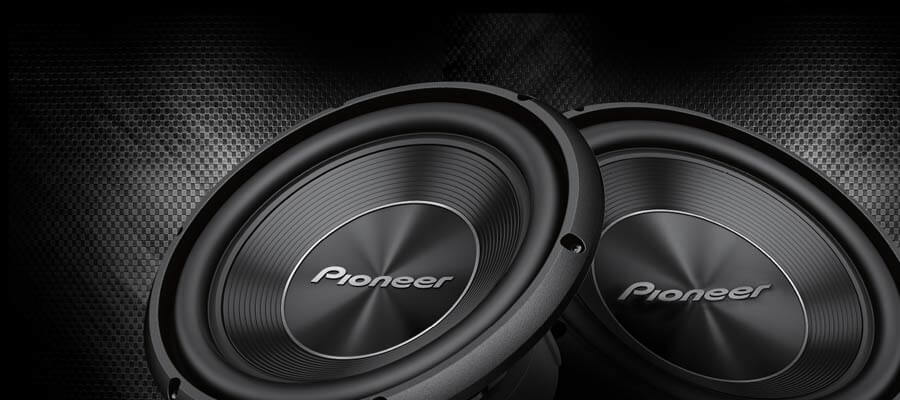
With the remote turned on connected, we are ready for a soundcheck. Even if you are installing a subwoofer, the first sound check should be done without the sub. You want to listen to your mids and highs and adjust gain and crossover point without the sub. If everything is to your satisfaction, go ahead and connect the subwoofer to complete your car stereo installation.
Here are More Articles Related to Car Audio On Sale
Here are More Articles Related to Car Audio On Sale